
peter @aimyskin.com
+86-18031361872
- All
- Product Name
- Product Keyword
- Product Model
- Product Summary
- Product Description
- Multi Field Search
Views: 126 Author: Site Editor Publish Time: 2026-08-22 Origin: Site


Investing in advanced aesthetic technology requires absolute precision. Receiving a defective or non-compliant high-value aesthetic device creates severe problems. It causes major operational delays in your clinic. Lost revenue and exorbitant international return shipping costs quickly follow. You can avoid these costly pitfalls easily. Implementing a strict Factory Acceptance Test (FAT) is essential. A robust pre-shipment inspection protocol ensures clinical safety. It guarantees your device matches all technical requirements before it leaves the manufacturing facility. We approach this through objective, evidence-based verification. We trust the manufacturer completely. However, we still demand verifiable proof of both functionality and regulatory compliance. In this guide, you will learn how to verify multi-spectral lighting capabilities. We will show you how to test software diagnostic accuracy effectively. You will also discover exact pre-shipment security measures to protect your capital investment.
Mandate a live or unedited video inspection of your exact unit, checking serial numbers against your purchase order.
Verify multi-spectral lighting transitions (RGB, UV, PL) and camera sensor resolution against contracted specifications.
Test software diagnostic accuracy, data security compliance, and UI responsiveness using standardized test profiles.
Confirm all OEM modifications and regional compliance certifications (voltage, CE/FDA) are physically present.
Require photographic proof of secure, impact-resistant packaging (e.g., aluminum flight cases) to mitigate transit damage.
You must establish clear inspection criteria before manufacturing concludes. Define strict pass/fail metrics based on your initial purchase agreement. Never rely on generic marketing brochures for quality control. Marketing materials often highlight theoretical maximum capabilities. Your inspection must focus on the actual delivered performance. Both parties need a shared understanding of what constitutes a successful test.
You have two primary verification methods available. Hiring an independent third-party QC inspector is highly recommended for bulk orders. Professional agents physically visit the factory to conduct standardized tests. For smaller orders, you can require real-time video demonstrations. The quality team at the facility must conduct this live video test. They should show every function working flawlessly in real-time.
Serial number tracking prevents unauthorized equipment substitutions. Always demand the exact serial numbers of the units undergoing inspection. Write these numbers down. You will verify them again upon delivery. This practice eliminates bait-and-switch tactics after you sign the QC approval. Some factories might test a perfect prototype but ship a different unit. Serial number tracking completely removes this risk.
Documentation review forms the foundation of any good inspection. You must request the internal factory QC checklist. Furthermore, demand the aging test reports. These reports offer proof the machine ran continuously for 24 to 48 hours. This continuous operation stresses the internal components. It helps catch electronic faults before the unit ships.
Request all test reports in English.
Ensure the factory stamps and signs the final QC document.
Ask for high-resolution photos of the testing environment.
Keep a digital backup of the aging test results.
Optical system checks are vital for clinical accuracy. Demand a full demonstration of the multi-spectral lighting system. The transition between different light modes must be seamless. Watch closely for any lag or flickering during these transitions. The RGB mode shows standard surface conditions. The UV mode highlights porphyrins and underlying sun damage. The Polarized light mode reveals pigmentation and vascular issues. Each mode must activate instantly.
Camera and sensor validation guarantees high-quality imaging. You must confirm the megapixel count matches your contract. Ask the technician to show the sensor brand via the software settings. Check the main camera lens for absolute clarity. There must be no dust trapped under the glass. Test the auto-focus speed by placing a subject in the hood. The camera should lock onto the face immediately.
Chassis and ergonomics impact daily clinic operations. Inspect the overall physical build quality carefully. Ask the inspector to push down slightly on the chin rest. It must remain completely stable under pressure. Examine the structural integrity of the hood. The hood must block ambient room light entirely. Ambient light leaks will ruin the diagnostic images. Check the responsiveness of all integrated touchscreens.
Hardware integration focuses on external durability. Verify external connection ports like USB and HDMI. The power supply port must be tightly secured to the chassis. Loose ports will eventually fail after repeated daily use. The cables should plug in firmly without wobbling.
Use the following matrix to guide your hardware validation process.
Component Category | Inspection Focus | Pass Criteria | Fail Criteria |
|---|---|---|---|
Multi-Spectral Lighting | RGB, UV, Polarized modes | Instant, flicker-free transitions | Delayed switching, dim bulbs |
Imaging Sensor | Megapixel count, auto-focus | Matches contract, rapid focus | Dust on lens, blurry captures |
Chassis Structure | Chin rest, hood, hinges | Rigid, blocks ambient light | Wobbly rest, light leaks inside |
Connection Ports | USB, HDMI, Power Input | Firm mounting, tight connections | Loose ports, intermittent power |
Diagnostic accuracy dictates the actual value of your device. Have the supplier run a baseline scan on a live test subject. Do not accept a pre-recorded scan. Verify the AI accurately identifies key skin metrics. It must quantify wrinkles, enlarged pores, deep pigmentation, and moisture levels. The resulting data should align visually with the test subject's actual skin condition. False positives in the software will frustrate your clinical staff.
Workflow and speed determine clinic efficiency. You need to measure the processing time directly. Start a timer right after the image capture phase finishes. Stop the timer when the final diagnostic report appears on the screen. A reliable system should render these complex results within 10 to 20 seconds. If the software crashes or stalls during rendering, fail the test immediately. Slow software creates frustrating bottlenecks in busy clinics.
Data security compliance protects your business from legal liability. Patient data must be securely stored inside the system. Verify you can back up this data to external drives easily. Test the export functions for patient records. Assess the software for basic compliance with local privacy regulations. You should look for password protection and encrypted databases. These features align with GDPR and HIPAA frameworks. Security cannot be an afterthought.
Integration readiness ensures seamless daily operations. Check API connectivity if the manufacturer promised this feature. Test the CRM export functions during the live demonstration. The device must communicate easily with your clinic's existing management software. Ask the technician to generate a sample report and export it. Confirm the exported file format is universally readable, like a standard PDF.
Accepting pre-loaded demo profiles instead of requesting a live scan.
Failing to test the software responsiveness under heavy data loads.
Ignoring patient privacy settings during the initial setup phase.
Forgetting to verify the final PDF report layout and branding.
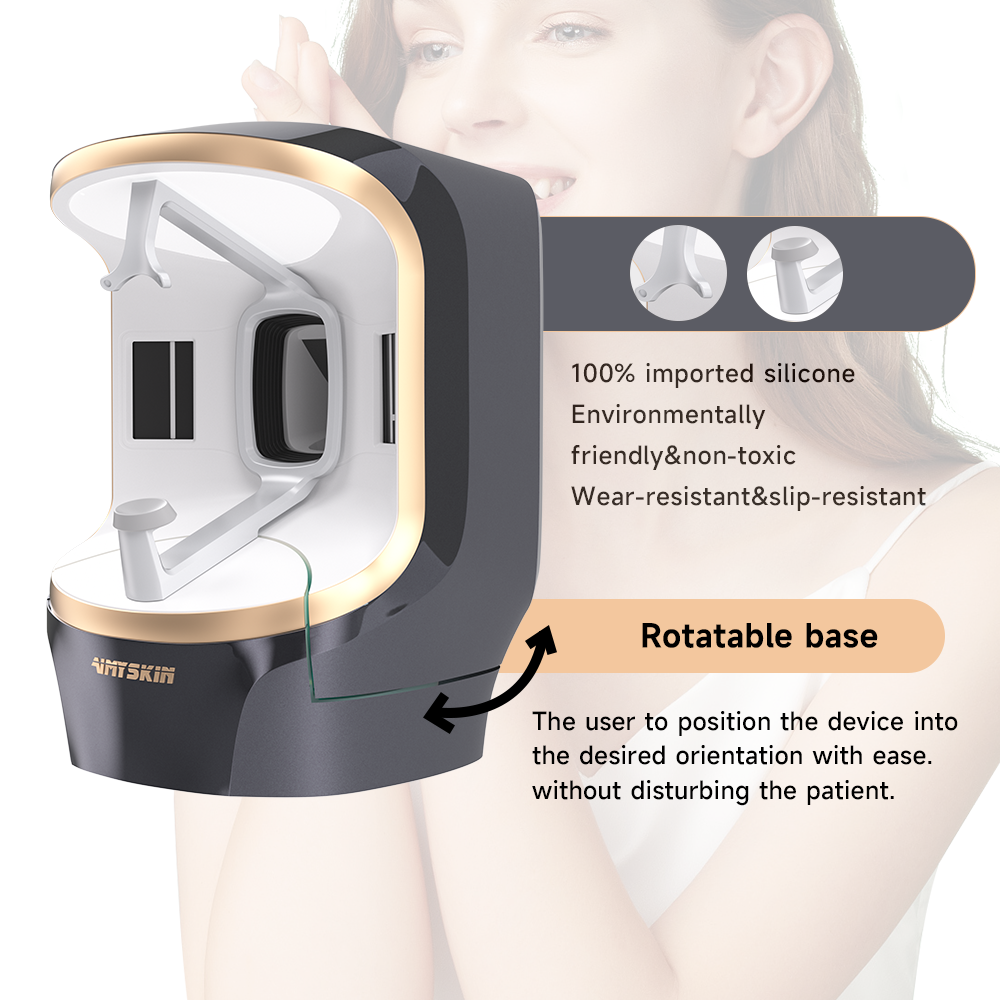
White-labeling transforms a generic device into your exclusive brand asset. You must verify all requested OEM and ODM modifications carefully. Check the external logos on the chassis for correct size and placement. Review the startup screen branding when the machine turns on. Ensure the software UI colors match your exact corporate brand guidelines. Incorrect colors or peeling logos reflect poorly on your clinic.
Localization and language settings require meticulous review. Ensure the software language has been properly localized for your specific region. Read through the main menus and patient reports on the video feed. Look closely for formatting errors or broken text strings. Poor translations diminish the perceived authority of your medical spa. Every diagnostic term must use correct clinical terminology.
Regional compliance guarantees the device operates safely in your facility. You must physically check the rating labels on the back of the machine. Confirm the voltage matches your country's standard grid. An accidental mix-up between 110V and 220V will destroy the motherboard instantly. Verify the plug type matches your local wall outlets exactly. Adapters are unreliable for high-draw aesthetic equipment.
Certification marks prove regulatory adherence. You must verify all required regulatory marks exist on the device. Look for permanent CE, RoHS, or FCC labels affixed to the back panel. Stickers that peel off easily are unacceptable. These physical marks must correspond perfectly to the digital certificates provided by the supplier. Discrepancies here can lead to equipment confiscation at customs.
Calibration standards maintain diagnostic consistency over time. A reliable 3D skin analysis machine requires a physical color and lighting calibration block. Ensure this block is securely packed in the accessory box. You will use this tool to reset the machine’s baseline lighting periodically. Missing calibration tools will render the AI diagnostics inaccurate after a few months. Ask the supplier to demonstrate a quick calibration cycle on camera.
Transit protection mitigates severe shipping risks. International freight is notoriously rough on sensitive optics. Require photographic proof of the internal packing method. Devices must ship in custom-cut, high-density EPE foam. This foam absorbs sudden impacts during transit. The outer shell must be an aluminum flight case or a reinforced wooden crate. Flimsy cardboard boxes will result in shattered lenses.
An accessory audit prevents missing crucial components. You must cross-reference the physical packing list visually during the video call. Ensure the primary power cables and physical user manuals are present. Check for software licensing dongles if your system requires them to boot. Verify any agreed-upon marketing collateral is safely packed inside. Missing a simple USB dongle will render the entire system useless upon arrival.
The final sign-off protocol protects your capital. Establish a strict payment rule with your finance department. The final balance payment is only released after this pre-shipment checklist is signed. Both parties must date and sign the final approval document. Never wire the final funds based on a verbal promise. Hold the leverage until you see verifiable proof of perfection.
A rigid pre-shipment inspection is your strongest defense against equipment failure. It protects your capital investment and ensures clinical readiness from day one. Reputable manufacturers welcome this high level of scrutiny. They know a rigorous FAT reduces post-sale support tickets and builds long-term trust. By validating hardware integrity, software accuracy, and packaging security, you eliminate international shipping risks. You must formalize these specific quality control steps into your standard purchasing contract. Implement these protocols before wiring any initial deposits to secure your operational success.
A: Yes, companies like SGS or local QC agents offer technical inspection services. Costs typically range from $200 to $400 per man-day. These independent inspections are highly recommended for high-value orders to ensure complete objectivity.
A: Do not authorize shipment. Require the supplier to repair or replace the unit immediately. They must conduct a secondary video inspection afterward. You should outline this specific penalty clearly in your initial purchase order.
A: Require written confirmation of the software license terms, specifying perpetual versus subscription models. During the video inspection, ask the technician to navigate to the admin settings. Verify visually that no unauthorized expiration timers exist.


